Flight Testing

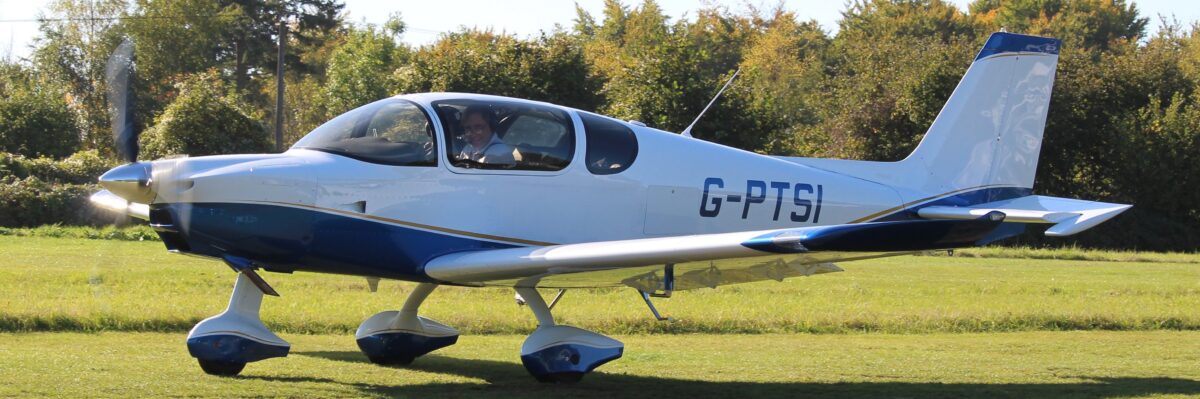
UK Light Aircraft Association (LAA) required a minimum of 5 hrs of testing with at least 15 landings, whilst remaining within 25 miles of the designated test base. The required test plans were: See LAA website for details The Garmin G3x allows the collection of a mass of data recorded every second. This can be easily analysed in applications like CloudAhoy later, greatly helping accurate data collection and flight re-runs like this: The mandatory testing was completed over a 2-week period, 4 flights including an endurance flight of over 2 hrs to test all systems and maximum temperatures and pressures. A MAUW climb test for 5 minutes was done with an average climb rate of ~830 feet/min. All avionics worked as designed. The elevator trim tab was adjusted slightly to achieve sufficient nose-down trim at a max cruise speed 139 KIAS.

More

Weight and Balance

The weight of G-PTSI with fire extinguisher and spats in place came in at 524.5 kG within a few kilograms of the other UK TSIs. Thanks to Tim for coming in to make the measurements and make the required report.

More

Lots of small tasks to finish the build

Safety wiring – magnetic plug on the engine Safety wiring oil and water radiator clips Camloc retaining spring on the cowling Loctite the wing fairing screws Making the door catches run smoothly – fitting the catch covers Rigging adjustments – full range without any interference Fireproof ID plate With my Tosten CS-8 grips I needed to use the offset bushes to pull position the grips slightly back in order to avoid a clash with panel switches at full forward elevator. Steering and rudder cable adjustment Initially unable to tighten the rudder cables due to lack of range on (new longer) eyebolts. Found to be clashing with retaining rivets. I was told all Slings have the same issue. After purchasing a LH 5/16 UNF tap I was able to clean out the threads and get a full adjustment range. G3X programming gauge limits Permit to fly application paperwork Ground check on autopilot Fuel flow check Test fit of spats Attach heat shields on the undercarriage at the brakes Fuel tank calibration Initially, both fuel senders were not moving when adding fuel 🙁 After some engine starts and fuel in place for a few days, I was beginning to get sensible readings. Note that they read in the opposite sense, (RH tank resistance increases with fuel and vice versa on LH tank). Calibrated up to 40 litres per site for the moment, Rear seat catch fitting Didn’t line up, so on factory advice removed some of the backstops. Printing placards and attaching registration plate Make some engine ground runs Run-up tests. Look for leaks. Gain an understanding of the checklist and the G3x operation. Develop a checklist install in G3x and print placards.

More

Magnetometer Calibration

I followed the on-screen tests for interference and calibration. Worst-case interference was 7% of the limit when taxi lights turned off. I did the swing test just outside the hanger and it calibrated the first time with no problem.

More

Fuel Flow Test

I did a fuel flow test. Checked both pumps and wing tanks. 20 to 22 seconds to deliver 1 litre makes > 140 litres/hr compared to max engine consumption of 43 litres/hr at take off a large margin.

More

Upholstery

The upholstery kit was the last one to arrive. I went with standard option 1 in grey. It was the only kit without shortage or backorders! Although the required M4 rivnuts were supplied as M5, no matter easy to source. It’s quite meticulous work and I did it on some of the hottest summer days in the UK. Inside the hangar and inside the plane with spray adhesive upside down. I just took it slowly 90 min at a time. The instructions are a bit thin and sketchy and it’s was a bit of a jigsaw puzzle to work about where each bit goes and how exactly it’s designed to wrap around what and where, but I figured it out. The passenger seat runs nice and smooth but the pilot seat is a bit stiff. It seems to be squashed laterally, even after I tried to increase the width and re-rivet. Very satisfying fitting the seat and finally having a sit-down 🙂 The finished look is very classy and has that new car smell.

More

First Engine Start

Checking the gauges before the first start – found that the wiring of the differential fuel pressure sensor was not correct. (Midwest colour coding of wires does not match the sensor as I had assumed!) Purged the fuel system from a 5-litre fuel can to clear any debris through the system. There was a bit well worth doing. Followed Rotax oil purge instructions. Started well on the second turn of the keys. Would probably have started the first time if I had kept the starter engaged a second longer. All gauges in the green. I made several runs. First run – 2 min stop check for leaks none found. Second run 20 seconds check turbo oil flow OK Third run 4 min oil up to > 50 C – all good no leaks

More

Windscreen

Quite a challenging task, probably the scariest in the whole project. First is to trim, trim, trim the windshield to size. The factory recommends an angle grinder. I used a Dremmel with a 38 mm grinder. Took most of a day and a lot of patience to trim the windscreen to fit exactly. There’s no going back if you trim too much! It’s a very dusty job, outside with a mask. To get the lines to trim and for the bonding itself, use good quality vinyl line tape to mask, mask, mask and get clean lines. The Sikaflex gets everywhere. Everyone says that, but until you use it you don’t really believe them. Lots of gloves lots of masking tape. Some help. There are several bottles to use. Cleaner (called activator the big bottle) Primer for GRP, Primer for the window itself. Take your time (it took us about 4 hours). Get some help (Thanks to Graham for all the tips). Get the Sikaflex evenly squished by using spacers. (It’s Important to read the Sikaflex application notes (mostly for marine applications) in addition to the Sling instructions. I am very happy with the end result.

More

Filling the Brake System

Messy job. On advice, I feed the brake fluid from the cylinder up to the reservoir. The trick is to be sure to remove all air bubbles from the master cylinder and purge the air out. To do this it’s important to have the centre console loose so it can be moved upside down allowing the air to move to the highest point.

More

Control panel

I sprayed the panel myself with Paragon Paints enamel Black (Night) BS381C – 642 , not too black, tried to match the black leather than go all out black black. With about 10% PT8 synthetic thinners. I am very happy with the result of the engraving done by Bay Engraving. I finished it off with 4 coats of good quality clearcoat. (Oppted for the longer lever for parking brake).

More

Fuel tank testing

I tested QB fuel tanks in several ways: Baloon test – test the circumference over 24 hrs Soap test high concentration of washing up liquid – look for bubbles Manometer test – 700 mm column of water. Look for change at constant temp and atmospheric pressure All tests are tempo and pressure-dependent. Probably the manometer is the most reliable if done the same temp to the same temp over x hrs. I pressured the tank to about 700 mm (using my lungs) and watched for a change over 24 hrs. The pressure initially changes as the temperature of the air equalises. In my case, both tanks were absolutely fine no leaks whatsoever. Less impressive were the 2 rivet tails found in each tank. Anyway managed to remove them out through the filler cap. Talking of filler caps. My QB tank has a ‘feature’. The filler cap receptacle is not aligned correctly. Attaching the fuel tanks to the wings took a long time, to align and figure out how the brackets go.

More

Paint

Choosing paint. I like the paint scheme of the Sling demonstrator plane in Torrance California N135WT. It’s very similar to my existing share group plane. I have gone with slightly different colours. White Blue MIPA B-5-04145.500 Gold stripe MIPA B-1-03780.500 The rear of front seats door latch cover composite MIPA O-7-00140.500  Mouse Grey.

More

Wing Stand

I need to ready the workshop to work on the wings which are now en-route. Luckily one of my neighbours was disposing of a large pallet. And another neigbour has a rather good table saw. Also one way to repurpose all the Sling packaging wood. Plan to use the stand inside a van to transport the wings. Then add some wheels later. The stand is also useful for holding the wings whilst working on them.

More

Test fit of empennage

Exciting moment. I wanted to see where the tail wiring connectors should be fitted. It was a sunny day so I pulled the plane out to make the first test fit. It also allowed the GTN650 to see some satellites and relocate to Europe 🙂 Later in May, I also checked the alignment of the empennage fixings and did some minor match drilling so it would be easier at the final assembly after paint.

More

Wings are on their way

My quick build wings shipped from Durban 25 March 2022. Its interesting to track the container ship. And frustrating to see how much time is lost waiting for a dock and time in port. Route Durban – Cape Town – Santa Cruz (Tenerife) – London Gateway Port.

More

Cowling

Quite tricky and time-consuming to get it right. 3 days. Decided to go with Camlocks all-around rather than Camlocks plus 4 Dzus fasteners in the lower cowling that the kit has. Some rework of fibreglass is needed. KAI is a bit unclear about exactly how many Camlocks to use on the horizontal seam. Looking at completed Slings some have 4 some have 5. I went with 5. Used a spacer at the prop hub to get the cowling in right place. Even so great care is needed in the trimming, to be sure it ends up in the right place. 3D printed a template for drilling the holes.

More

Instrument panel first switch on

An exciting moment. The G3x immediately found (over the CAN bus) the magnetometer (GNU11) and audio panel. I initially had problems recognising the transponder. Made a software update G3x V6.0 now. Then reinstalled the config file. Then it worked fine. Flaps, inside lights, boost pump. G5 all work fine. I have never used a G3x, so I spent some time getting to know the panel and adjusting the infinite number of settings! The G3x is an awesome piece of equipment. Found couple of errors in the wiring harness. The lane B LED and Lane B switch were wrong way around. Easily fixed by re pinning the CPC connector. The wiring of the IBBS 1 and 2 battery volts monitors were not made in correct locations. Rewired D connectors to set GP3 and GP4 on the GEA24 for IBBS volts. I had to remake four loose crimp connectors at the relays. Found a loose engine sensor probe which was giving an error on the G3x. All systems seem to be working fine now. (no engine start done yet) but only error is the magnetometer calibration not done.

More

Avionics rack and wiring harness install

Got started on fitting the rack today. Doubler panel. The latest offering (Jan 2022) from MWPB splits the harness into two. One for the airframe and one for the equipment rack behind the dash. It is quite overwhelming figuring out where the tentacles of these wiring harnesses go at first. Unlike the rest of the Sling kits where you have many diagrams and the parts down to every last rivet and grommet. The MWPB panel and harness no install instructions or layout diagrams other than Facebook videos. You are also on your own sourcing any extra clams and tie wraps. Two things were needed to get started. Where do the ground and power busses mount, and which wires need to go through the firewall (so that I can get that done and fix the top skin). Once I got my bearings, it become s easier. The rack behind the dash has a sub-rack that is designed to mount an audio panel transponder and second com radio. It’s white heavy (820 g) and made from 2mm aluminium. I also was concerned about accessibility to service the audio [panel after the windscreen is fitted. I could not see how it could be removed. (Whereas the transponder can be removed with screws from below). I decided to remove the sub-rack to save weight and improve serviceability.

More

Seat belts

Test fitted the seat belts to see if I have all the right bits. KAI is not clear. Emailed with factory, updated the rivets to 4.8 mm on the front seat belt brackets. Torqued the belt clamp AN4 bolts to 7 Nm. Will fit the belts later when nearer completion. At least I know how they all go for now.

More

Static Ports

The factory has moved the static ports to 25 mm in front of the Nacca duct. (Used to be in the rear fuselage). The ports now require a shield to be riveted around them. A kit is on its way to me. Although not essential, I wanted to get the ports installed before the top skin is fixed as it’s easier. Unfortunately the rear of the static port clashes with the Nacca duct, so I machined a little of the Nacca duct away and filed the static port to fit.

More

Getting ready for closing front composite

The arrival of my avionics panel is imminent and I will need to fit the LRU rack. To do so ideally the front composite needs to be in place to secure the avionics first rib. With the front composite and LRU in place, access to the heater, fuel pipes and rudder pedals will be difficult. So finished off the rudder pedal riveting to the floor and pedal rivet, ensuring free movement in the plastic bushes (I had earlier filed the lock plates and bushes for a smooth movement). Rudder pedal assembly install is quite difficult in a QB, as you have poor access. Attached the rudder cables and steering pushrods. Torqued nyloc nuts AN3 to 3 Nm and AN4 to 8 Nm and marked. Fitted booster pump. Assembled so that it can be removed with its attached hoses and check valve as one. Likely the SAE R9 fuel hose will need replacement when needed on condition in 5 to 10 years time. Fitted heater temperature control wire. (removed 200 mm from the 1m Bowden tube). Per Evans video. Fitted heating hose, ensured hose clamps well seated. Would be fiddly to fix later. I am using the large ‘Rotax’ firewall hole for all electrical connections. Because the large Rotax connectors have to pass through, there’s a large hole to be filled. I remade the kit ‘horse shoe’ plates to a smaller diameter (34 mm to close up the hole. The remaining gaps to be filled with high temp RTV.

More

The Journey Begins

7 Oct 2021 first delivery My Sling TSI quick build kit first delivery. Although as I found out later, there were many missing pieces in the kit at this stage. Thanks to Bill for helping to unload the kit.

More